| ProLinga Tutorial |
|---|
A toolbar normally contains a selection of often used action that are also defined as an action in the pulldown menu. Toolbars are created in the painter and are push buttons with an action handler attached.
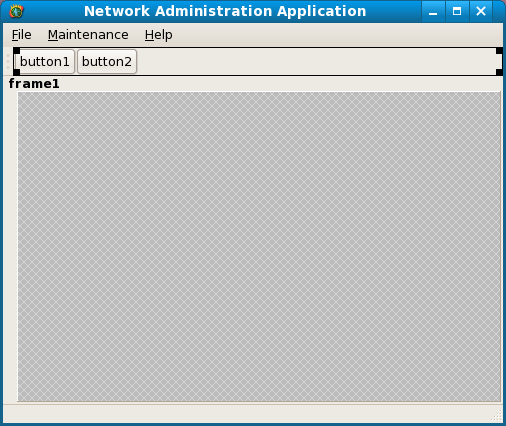
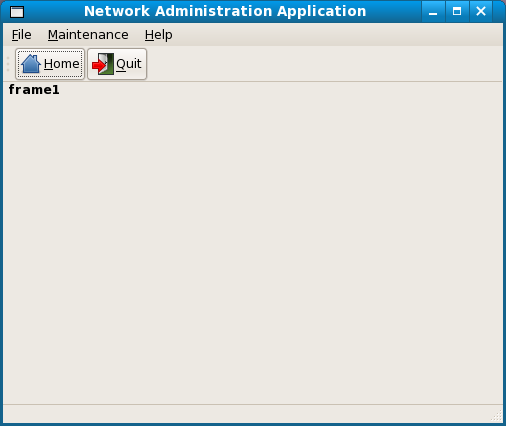
Open the screen "Main" in the painter in the ProLinga Developer. We reserved 2 places on the toolbar. We first have to place buttons in those empty slots. Select "Button" from the palette and click on the empty space on the toolbar. It now should put a button in place. Repeat that for the second button.
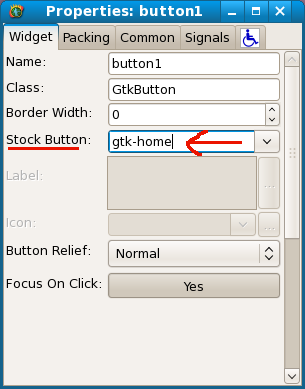
The first button we want to name "Home". The painter comes with a range of icons that can be used on buttons like this. They are called "Stock Buttons". If you click on button 1 on the toolbar you can select the "Stock Button" called "Home" in the Properties Window.
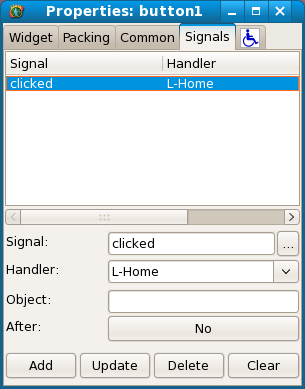
The action handler that we want to link to this button is the same as the one we linked to
the pulldown menu "Home" which is "L-Home". This will call ProLinga logic with the name "Home" when
the user clicks on it. To set the action handler, stay in the properties window and click the
tab Signals. In the field "Signal" we can define a signal that will trigger
the call to our logic "Home". If you press the "..." button next to the field, you will get a list
of possible actions. We want this to take place if the user clicks the button. Therefore
we select the action "clicked". The handler is, like in the case of the pulldown menu, L-Home.
After you have typed then in, you have to press the button "Add" to add this new entry to the list.
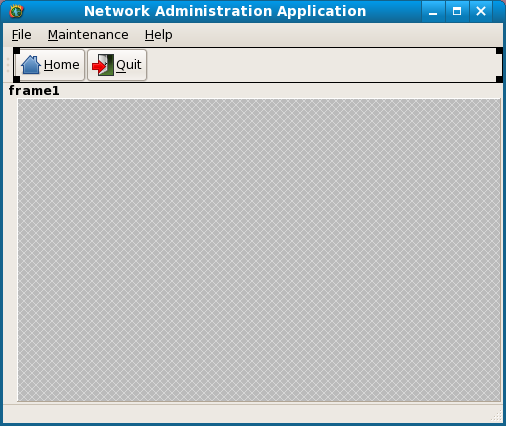
The second button will be called "Quit" and the action handler is "C-exit". There is a "Stock Button" for this as well. If all went well, your screen now looks as follows in the painter:
Save the screen in the painter, exit the painter and save the screen in the Screen Editor. Run your application and test the toolbar.
| << Populate Pulldown Menus | About Screen >> |