| ProLinga Tutorial |
|---|
In our pulldown menu entry Help/About we created an action handler S-About. This means that if a user selects this option, a screen with the name "About" will be displayed. To practise a bit more with screen painting, we will now create this screen.
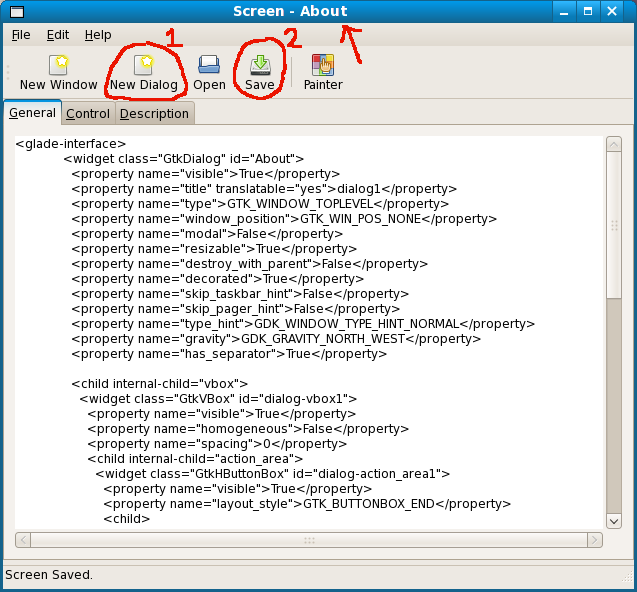
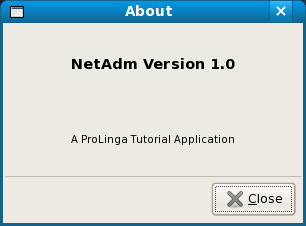
The "About" screen will be a of type "Dialog". This means that the screen must be closed before the user can continue with the application. Open the Screen Editor in the ProLinga Developer and press the button "New Dialog" on the toolbar. A standard template will populate the Editor. Save the screen and name it "About".
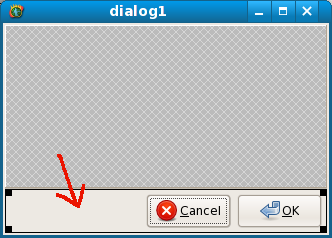
Bring up the screen in the painter. By default, a Dialog is displayed with an "OK" and "Cancel" Button. In this case, we only want a button called "Close". To change this click on the button box on the screen.
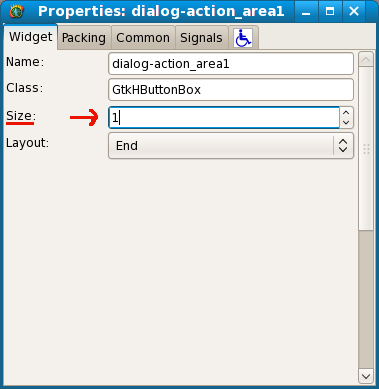
Go to the properties screen and change the size from 2 to 1.
Change the "Cancel" button to a "Close" button. Click on the button, go to the properties screen and change the "Stock Button" to "Close". Add the signal "clicked" and action handler "C-cancel".
Set the screen title similar like we did on the Main screen. Call it "About".
Set the screen width to 300 and the height to 200
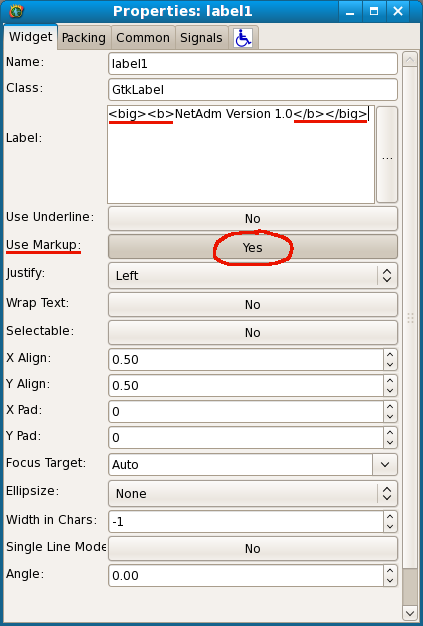
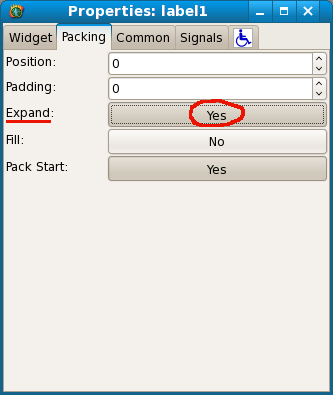
In the big empty space on the screen, place a "Vertical Box", like we did at the previous screen. Set the number of rows to 2 and fill row 1 and 2 with a "Label". In the properties screen of the "Label", you can type any text in the field "Label" under the tab called "Widget". You can also use Pango markup like <big>label</big>. Other examples are <small>, <b> for instance. You have to change the setting "Use Markup" to "Yes".
Under the tab "Packing", on the properties screen of a label, you can switch the setting "Expand" to "Yes" to get a nice layout.
Run your application, go to the pulldown menu "Help" and select "About.
| << Create Toolbar | Data Source Object >> |