| ProLinga Tutorial |
|---|
When creating the screen, we added pulldown menu structure in the first section. Now we are going to put the right names and actions in place. As soon as a user selects an option from one of the pulldown menus, some action needs to happen, like display another screen, or start a calculation etc. In ProLinga, this is controlled by "Action Handlers". Currently, there are three types of "Action Handlers":
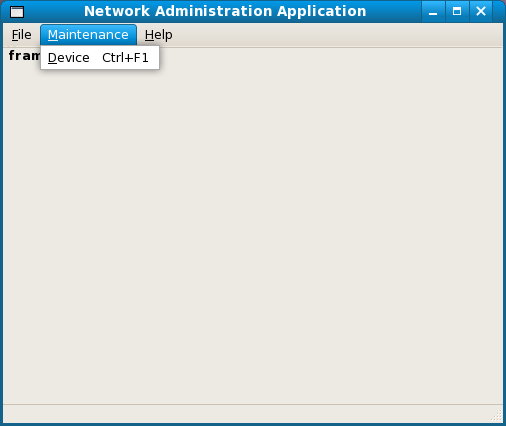
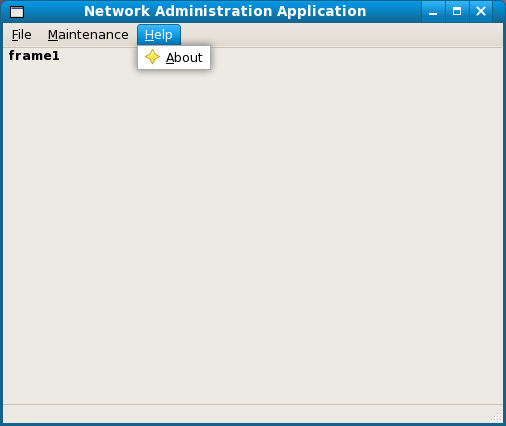
In the tutorial application, we will create the pulldown menus File,
Maintenance and Help. The pulldown menu entries and action handlers are
outlined below. Most actions probably do not make much sense yet, but it will become clear once we create the logic and
screens referenced here.
Table 1. Pulldown Menu File
| Name | Action Handler | Description |
|---|---|---|
| Home | L-Home | This will call logic called "Home" to clean up the main screen. |
| ------- | (leave blank) | Separator line in the pulldown menu. Cosmetics only. |
| Logout | C-logout | This will exit the application and return to the ProLinga logon screen. |
| Exit | C-exit | This exit the application. |
Table 2. Pulldown Menu Maintenance
| Name | Action Handler | Description |
|---|---|---|
| Device | L-Device | This will call logic called "Device" to provide a inquiry/update mechanism of available devices |
Table 3. Pulldown Menu Help
| Name | Action Handler | Description |
|---|---|---|
| About | S-About | This will display a screen with some application information. |
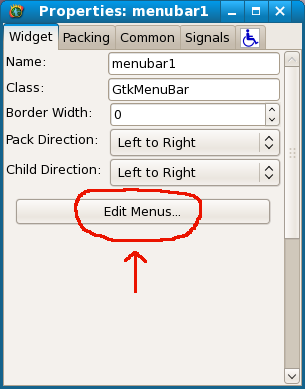
Open the screen "Main" in the painter in the ProLinga Developer. If you click on the pulldown menu, you will see a button called "Edit Menus...".
Press the button "Edit Menus...". All pulldown menus and entries will be displayed on a separate screen.
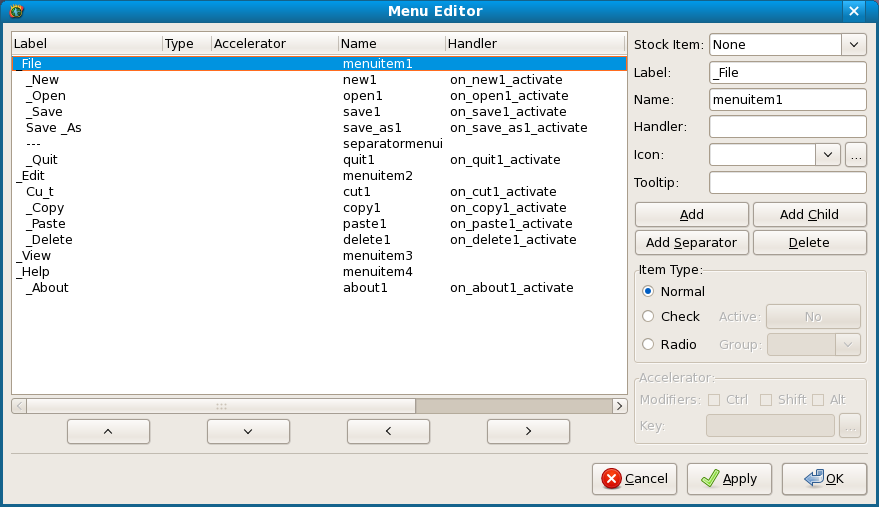
When clicking on a line, details will be displayed in the right portion of the window. You can set details here like "name" and "action handler" as well as link icons to the menu entry or an accelerator. With the navigation buttons at the bottom of the screen you can change the order and hiearchy. When using an underscore sign "_" in the label name, the following character will be set as mnemonic.
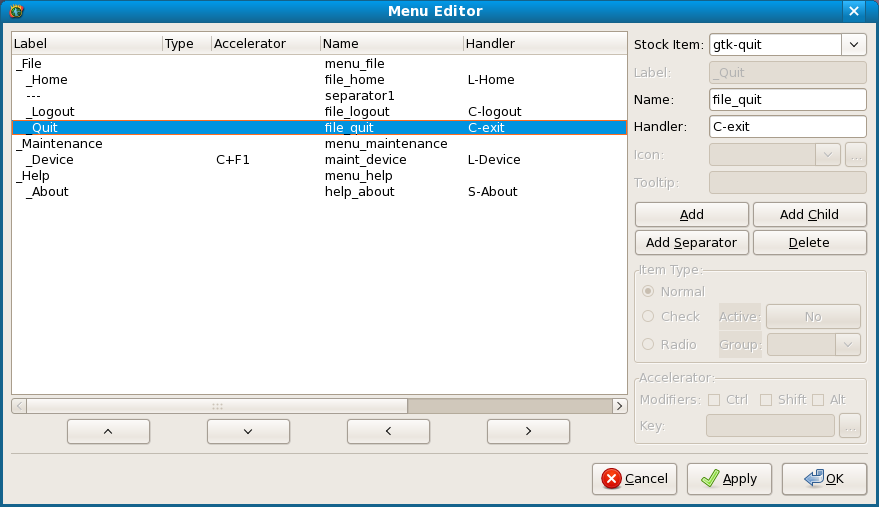
Edit the various menus, until your screen looks as follows:
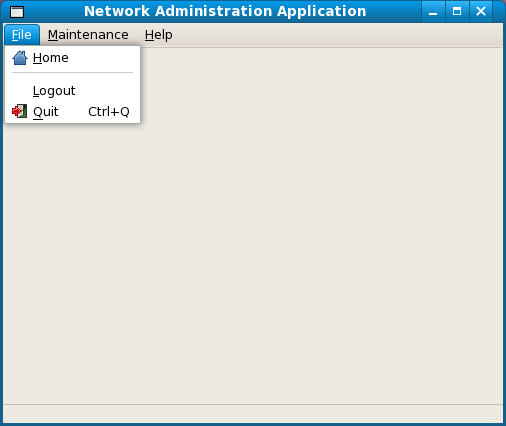
Save your screen in the painter, exit the painter, save your screen in the ProLinga Screen Editor and run your application. At the run-time your application now looks as follows:
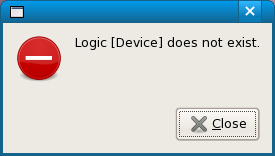
If you click on any of the menu items linked to logic, you will get an error telling you that the logic does not exist. That is correct, since we have not written them yet.
The same applies to the screen. The Control "action handlers" logout
(File/Logout) and
exit (File/Quit) should work OK.
In the next chapter we will create the toolbar.
| << Paint Screen | Create Toolbar >> |