| ProLinga Tutorial |
|---|
Now that we have the connection from our application to the database in place, it is time that we build a table. The name of the table that we want is "Device" and the fields that we want in that table are as follows:
Table 4. Table "Device"
| Field Name | Data Type | Length |
|---|---|---|
| deviceNumber | Unsigned Decimal | 5 |
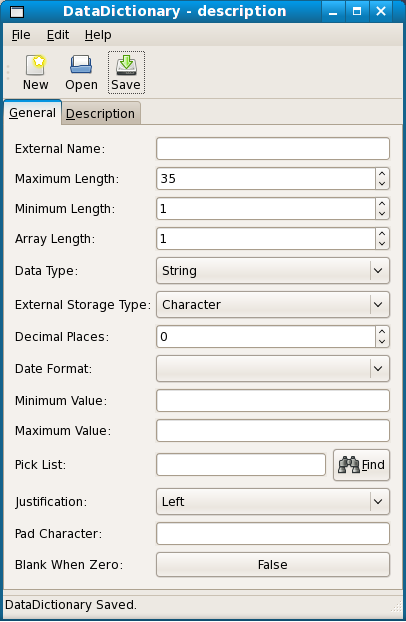
| description | String | 35 |
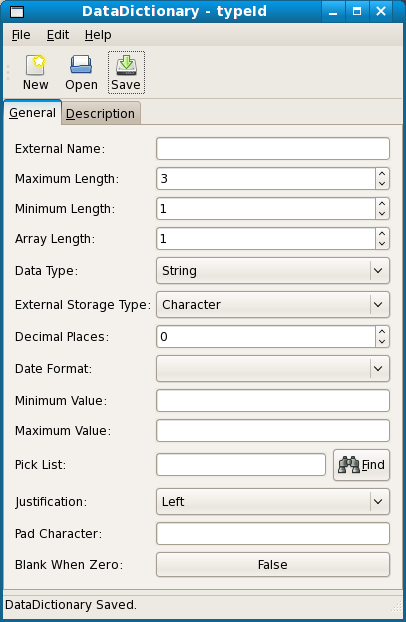
| typeId | String | 3 |
| dateInstall | Date (format CCYY-MM-DD) | 10 |
The primary key will be deviceNumber
There are 4 easy steps involved in creating a table in ProLinga:
Record.Index.Table definition and assign the Record(s) and
Index(es) to it.From this point on we should not be using the terminology "Field Name" any more when refering to table definitions in ProLinga. Instead, ProLinga uses the concept of Data Dictionaries. A Data Dictionary is a very powerful reusable object. Think of 2 tables for instance that both have a field called "description". In traditional database environments, you have to create this field 2 times. Besides more work, also there is a chance that 1 field has a length of 15 and the other of 35 and that data can get lost when assigning one to another. In the case of ProLinga, we will use the same Data Dictionary for both tables, eliminating the possibility of incompatibility.
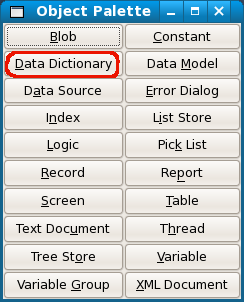
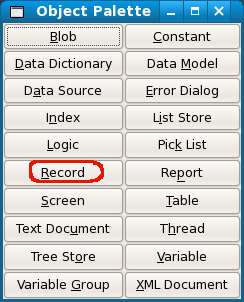
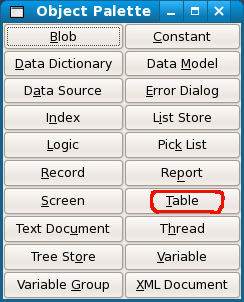
To create the Data Dictionaries, open your application in the ProLinga Developer and select "Data Dictionary" from the Object Palette.
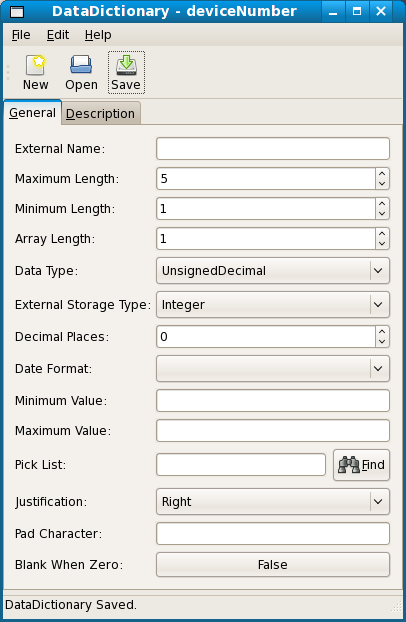
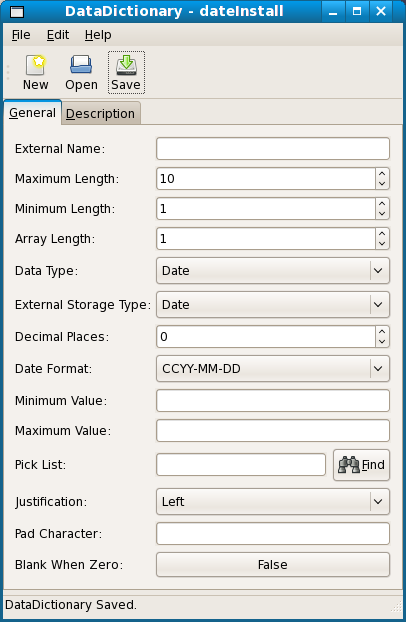
Press the button "New" on toolbar of the Data Dictionary editor to make sure you start with a new object. We first will create the Data Dictionary "deviceNumber". Set the "Maximum Length" to 5, "Data Type" to UnsignedDecimal, "External Storage Type" to Integer and "Justification" to Right. Leave all other fields default as they are. Save the Data Dictionary and name it "deviceNumber".
Some details of key fields. The "Data Type" is the type of the data within ProLinga, while "External Storage Type" is the type of the data in the database. Most of the time they will be of a similar type, meaning that a String translates to the type Character and Unsigned Decimal to Integer, but there maybe situations that this is not the case.
The same way, create the Data Dictionaries "description", "typeId" and "dateInstall".
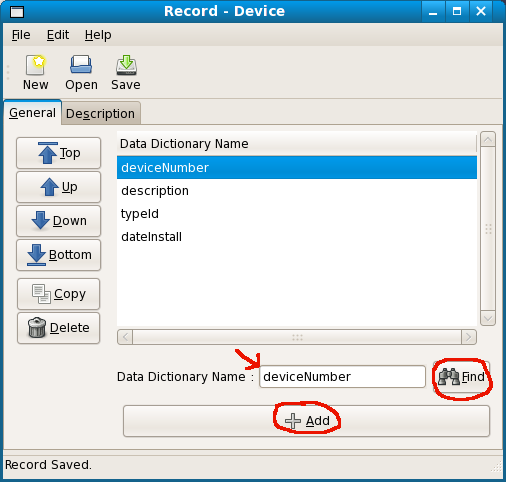
Once we created all the Data Dictionaries that we need for our table "Device", we can group them together in a Record. Open the Record editor from the Object Palette.
Type in the name "deviceNumber" in the screen field "Data Dictionary Name" and press the "Add" button. You will see that the name now shows up in the list. Add the same the Data Dictionaries "description", "typeId" and "dateInstall". Instead of typing them in, you can also select them from the list when pressing the button "Find". The order from top to bottom will be the order of the fields in the database from left to right. It is important to get this right. When finished, save the Record with the name "Device".
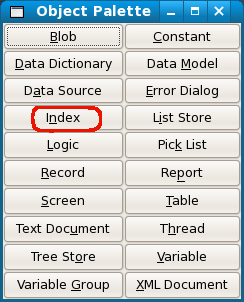
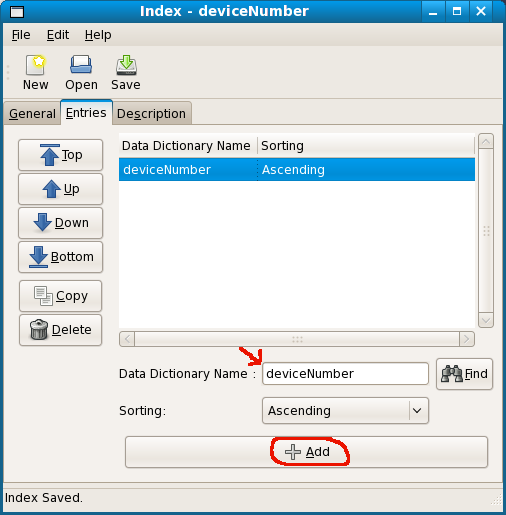
On a similar way, we can create an index. Open the Index editor from the Object Palette.
Click on the tab "Entries" and add the Data Dictionary Name "deviceNumber". Save the index with the name "deviceNumber."
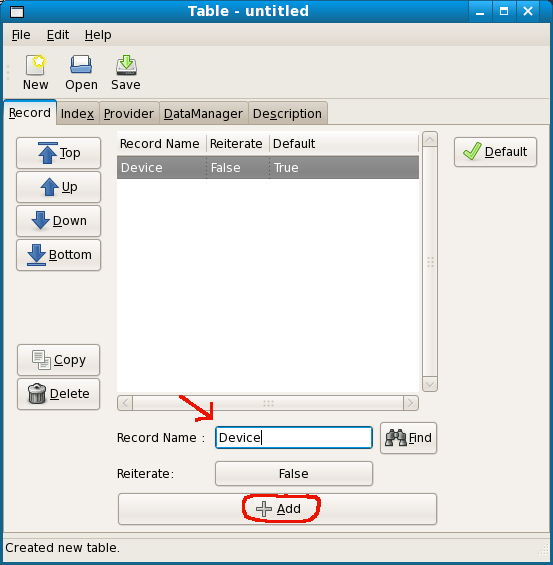
Finally, we create the Table itself. Open the Table editor from the Object Palette.
Add the Record to the Table definition by typing the name of the Record "Device" in the field "Record Name" under the "Record" tab and press the "Add" button.
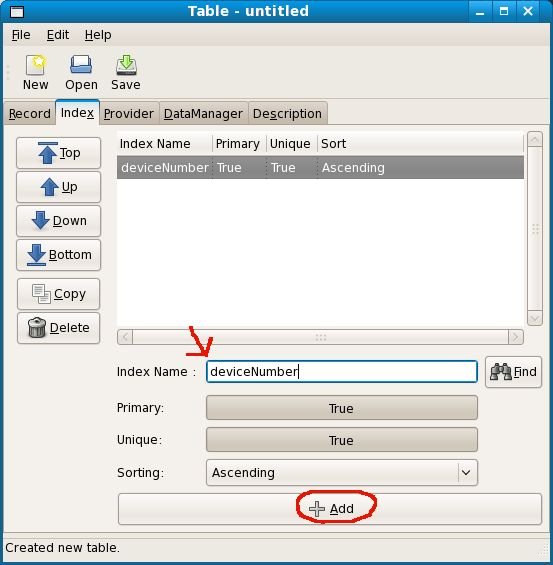
Press on the tab "Index" and add the Index called "deviceNumber".
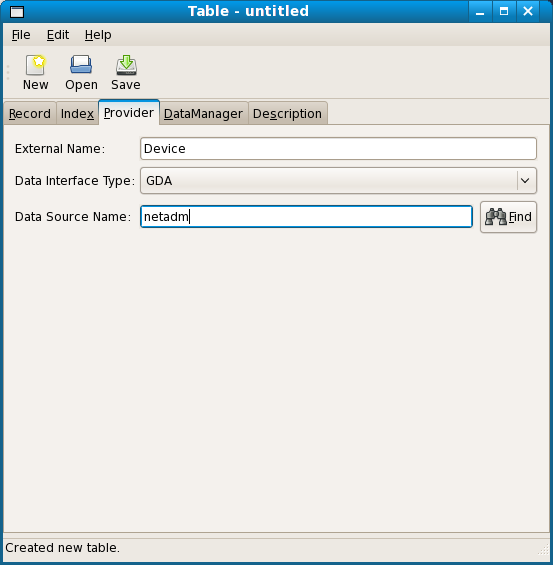
Click on the tab "Provider". The "External Name" will be used for the physical file name in the database. So enter "Device" here. As "Data Interface Type" choose GDA and the Data Source is the one we created earlier with the name "netadm".
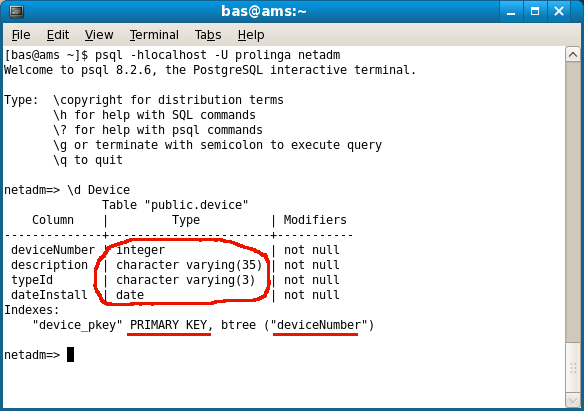
Now save the table and give it the name "Device". Now click on the tab "Data Manager" and click the button "Build Database Table". If you receive no error messages, all went OK and your table is now created in the database. To double check this, open an interactive terminal for your database and check if the new table is present.
As you can see, all the fields are available as well as the index. At this stage, we can not test this yet in our application, as we do not have any data entry screen. Please proceed to the next chapter to build one.
| << Logon to Data Source | Paint Data Entry Screen >> |